Heads up! We have a new documentation site and this article has been rewritten.
Check out the latest version of this article →
To follow the steps as described in this article a basic knowledge of HTML, Javascript and CSS is required.
There are two ways you can use Tweakwise with Javascript:
- Using a Javascript file hosted by Tweakwise (default)
- Using a Javascript (and CSS) file hosted yourself
This article explains the second option.
Standard Site Search
Implementing using a Javascript (and CSS) file hosted yourself requires more effort than the first option. But it will give you full control over all available options and the way the results are displayed. To implement Tweakwise Standard Site Search using Javascript this way, follow the steps below:
Step 1: Installation
The script can be installed by including it in your site's HTML:
<html>
<head>
<!-- ... -->
<script>
window.tweakwiseFailover = function (src) {
var script = document.createElement('script');
script.async = true;
script.src = src;
document.head.appendChild(script);
};
</script>
<link
rel="preload"
href="https://gateway.tweakwisenavigator.net/js/starter.js"
as="script"
data-failover-src="https://gateway.tweakwisenavigator.com/js/starter.js"
onerror="tweakwiseFailover(this.dataset.failoverSrc);"
/>
<script src="https://gateway.tweakwisenavigator.net/js/starter.js"></script>
<!-- ... -->
</head>
<body>
<!-- ... -->
</body>
</html>
For optimal performance, we recommend loading the Javascript on the page as early as possible. The script uses the 'DOMContentLoaded' event to retrieve the settings and display the results on the page. Loading the Javascript after the 'DOMContentLoaded' event will have an adverse effect on the script's performance. For more information on the 'DOMContentLoaded' event follow this link.
Step 2: Configuration
Besides the script itself, there's only a very minimal configuration that needs to be done to get the implementation working. To do this, you only need to add the instance key to a piece of Javascript. You can find this key in the Connectivity > Endpoints module in Tweakwise.
<script>
window['twn-starter-config'] = {
instancekey: 'INSTANCEKEY',
};
</script>
Now the rest of the implementation can be configured in the JS implementation module in Tweakwise. Select at least the input and output elements using a valid CSS selector.
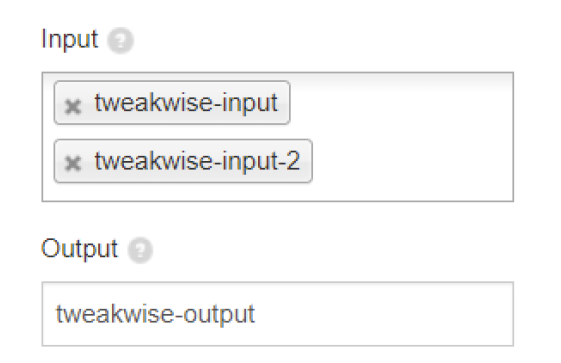
Please make sure the output element contains all content of the page that should be hidden when the search results are displayed. This is because the search results container acts as a temporary overlay of the content of the page. The user will be able to close the overlay again and view the original page content.
It's possible to overwrite the configuration from the JS implementation module by adding extra options to the initial Javascript configuration.
Some options are only available if you implement them this way and cannot be activated in the JS implementation module.
For an overview of all available options read this article.
Step 3: Styling (optional)
It's possible to edit the standard theme of the implementation by adding a custom stylesheet. For example this enables you to change the fonts and colors of the implementation. This stylesheet must be hosted by you and can be added to the page.
<link rel=”stylesheet” href=”https://your-domain.com/custom-stylesheet.css” />
Medium Merchandising
When you have implemented Tweakwise Standard Site Search using a Javascript (and CSS) file hosted yourself you can quickly move your implementation to Medium Merchandising.
All you have to do is extend your existing configuration to provide the script with a valid Tweakwise category ID. This will activate the Tweakwise product lister page. This category ID is different per page and can be empty on pages where you don't want to use the product lister page. This is useful on for example the home page.
The snippet below shows how you can provide the Tweakwise script with a category ID.
<script>
window['twn-starter-config'] = {
instancekey: 'INSTANCEKEY',
navigation: {
cid: 'CATEGORYID',
},
};
</script>
Change output (optional)
It is also possible to use a different output container for the product lister page than for the search results. For this you only have to select a different HTML element in the navigation.output option using a valid CSS selector. When you have selected an HTML element it will then be used as the output for the product lister page. The default output option will still be used for the search results.
<script>
window['twn-starter-config'] = {
instancekey: 'INSTANCEKEY',
output: 'OUTPUT FOR SEARCH RESULTS',
navigation: {
cid: 'CATEGORYID',
output: 'OUTPUT FOR PLP',
},
};
</script>
Filter preselection (optional)
It is also possible to add a preselection of filters to the product lister page using the navigation.filters option. This option will apply these filters to the initial fetching of the page.
<script>
window['twn-starter-config'] = {
instancekey: 'INSTANCEKEY',
navigation: {
cid: 'CATEGORYID',
filters: {
tn_fk_color: 'Blue',
},
},
};
</script>
In the example above the color with value 'Blue' is preselected.